

English
Datamoshes
Dataḁ̸̬͋ă̷͍ȧ̴͇͘͝ͅá̷̖̲͑ã̶̺̈́å̷͉̖͊̚ä̷̬̬â̷̡̱̑ Mo̴̞̜̯͋ȯ̴̪̏͂õ̷̧͚ͅȏ̸͇ö̵̟̻̹͌o̶͚͍̻̕ǒ̸̢͎̄o̵͔̘̓͘o̶͇̐o̸̬͒͗̎shDatamosh is a technique of damaging clips to create glitchy effects which frames that need to progress, don’︀t progress!
OH’︀s Datamosh was made possible with the use of Vegas-Datamosh by delthas
Note
- I-frame: Intra Frame
- P-frame: Forward Predicted Frame
- B-frame: Bi-Directional Predictive Frame
Datamosh
Datamoshes the video with determined settings.
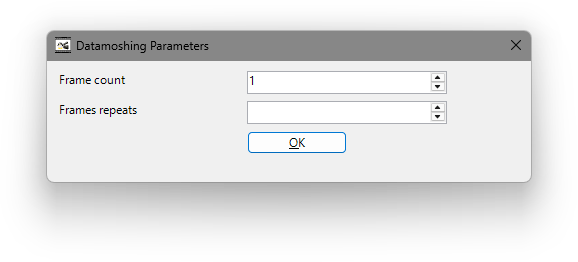
- Frame Count
- Amount of frames to use.
- Frame Repeat
- Amount of times the frames will repeat.
This repeats N P-frames M times. N is the Frame count, M is the Frame repeats.
To use, make a selection in the timeline using I and O, then it will be rendered and datamoshed and added to your project, all in one click. It can take quite some time for long selections so wait if Vegas seems to freeze.
The start of the selection is the first P-frame that will be repeated. The P-frame will be relative to the previous frame, which will be rendered as an I-frame. So for best results, the start of the selection should be a frame with a lot of movement.
The end of the selection simply tells the script until which frame it should render the datamoshed file. The longer the selection, the longer the render time.
Datamix
Datamoshes the first frame of the selection.
IMPORTANT
Requires the selection to be set equal or greater than frame 1.
This replaces the first I-frames of a clip by a frame of another clip.
To use, make a selection in the timeline using I and O, then it will be rendered and datamixed and added to your project, all in one click. It can take quite some time for long selections so wait if Vegas seems to freeze.
The start of the selection is the I-frame of the clip that will be replaced by another I-frame. The image used for the new I-frame will be the frame just before the start of the selection. So make sure to place the image you want to datamix from, just before the selection start.
If you want to datamix on a scene change, you can typically split the clip at the exact frame where the scene changes, and select the right clip. This will datamix the right-hand side clip onto the last frame of the left-hand side clip.
The end of the selection simply tells the script until which frame it should render the datamoshed file. The longer the selection, the longer the render time.
Layer
Layers’︀ the selected clip for moshing.
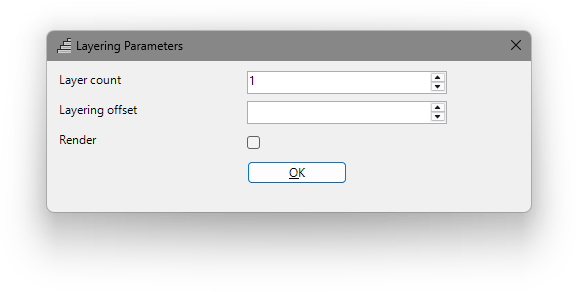
- Layer count
- Amount of layers to generate.
- Layering offset
- Offsets the layer by the number of frames specified.
- Render
- Renders the clip selected after generating layers.
This does multilayering, by copying the select video clip/event N times, each time offsetting the clip by M frames. N is the Layer count, M is the Layering offset. You can also choose to automatically render the multilayered clip by checking the Render hitbox, otherwise the copies clips will simply be added to the timeline.
To use, select a single video clip/event, then it will be multilayered automatically, and rendered transparently if specified.
You can use a negative offset (eg -2 instead of 2), in which case the newest clips/events will be added at the back, instead of the front of the previous events.
If you choose to render automatically, the rendered file will support alpha/transparency, meaning you don’︀t need to add a green screen and remove it after, the alpha is handled automatically.
Render
Renders the clip within a timeline selection… (Yes that’︀s literally it.)
This simply renders a part of the timeline and places it into the timeline in a single click.
To use, make a selection in the timeline using I and O, then it will be rendered and added to your project, all in one click.
The rendered file will support alpha/transparency, meaning you don’︀t need to add a green screen and remove it after, the alpha is handled automatically.
Scramble
Scrambles the clip with random time placements dependent on the size.
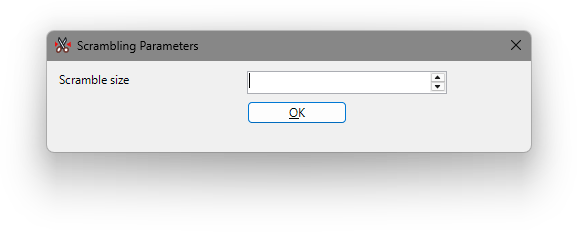
- Scramble Size
- The value of the size for the clips to be generated.
This simply scrambles multiple clips/events, by cutting them in subclips of length N, and shuffling the subclips. N is the Scramble size, and is usually 1.
To use, select several clips/events (they must be actually selected, not only in group-selected), then they will be scrambled automatically.
Clips starting and ending at the same time will be scrambled together, ie their subclips will be shuffled the same way.
Automator
Automates and Randomizes the values of Visual effects in the clip.
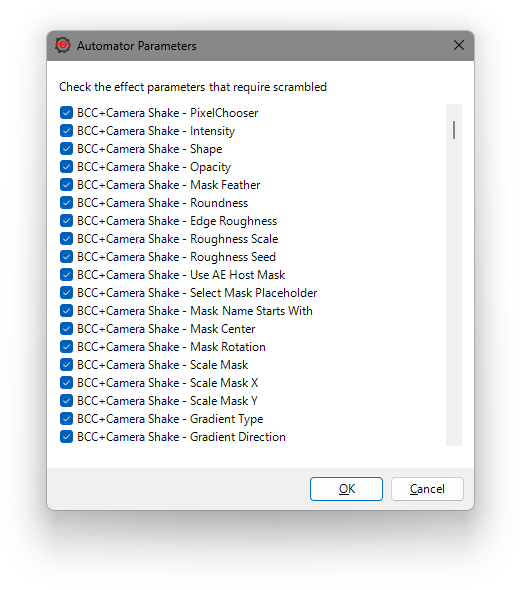
IMPORTANT
This requires Visual effects to have automation on to work.
- Scramble
- It will ask if you wish to automate the Visual effects in the clip, for each effect.
This randomizes the video effects of selected clips/events, by adding random keyframes every frame for each parameter type you select.
To use, select several clips/events which have video effects on them (they must be actually selected, not only in group-selected), then start the script. For each type of video effect parameter on any of the clips, you will be prompted for whether you want the script to scramble the parameter (replace all the current keyframes of the parameter with random keyframes), or not (leave the keyframes as is).
Only OFX video effects are supported (newsprint, mirror, …); they all have the same look, it’︀t easy to identify which effects are OFX. Other effects are ignored.
Stutter
Stutters clips by Forwarding and Reversing them in randomized intervals.
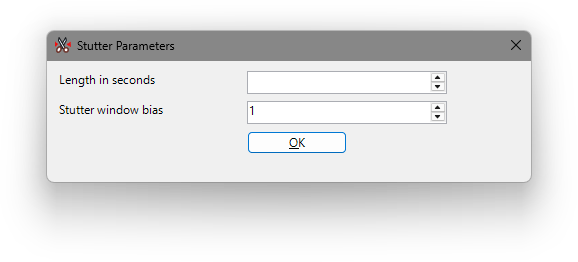
- Length in Seconds
- Duration of clips to be generated.
- Stutter Window Bias
- The value in which stutter will randomize the clips.
Shake
Shakes the clips.
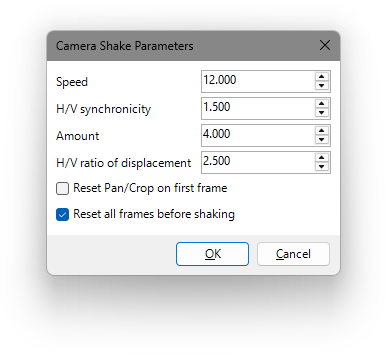
- Speed
- The frequency value of the shaking effect.
- H/V Synchronicity
- The relative vertical speed value.
- Amount
- The value of pixels the camera shifts from the center.
IMPORTANT
This also controls the margin of the zoom in.
- The value of pixels the camera shifts from the center.
- H/V ratio of displacement
- The value of the horizontal distance multiplied.
IMPORTANT
This controls the zoom in.
- The value of the horizontal distance multiplied.
- Reset Pan/Crop on first frame
- Leave unchecked to shake within the current video zoom.
- Reset all frames before shaking
- Leave unchecked to apply and multiple the shake effect with the previous shake effect.